|
|
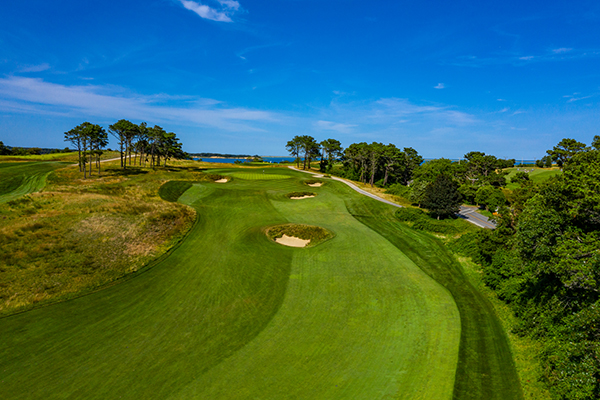
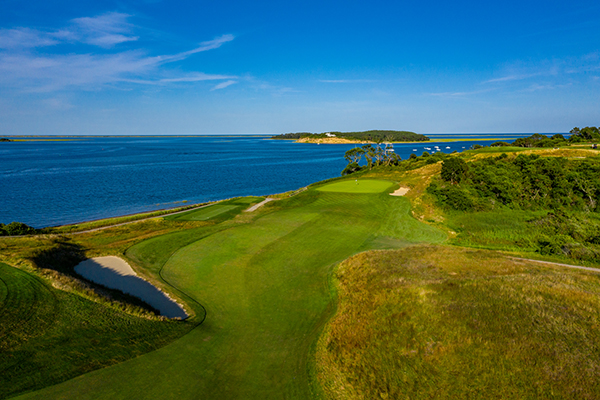
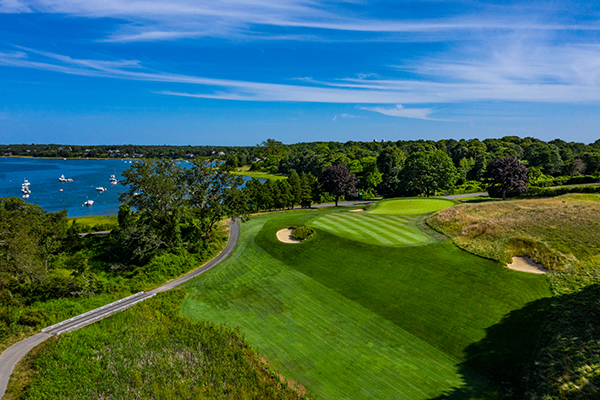
Hole 1
Fowler's opening hole gets the golfer on their way with a rather wide fairway. The huge bunker in the middle is 290 yards away and must be avoided at all costs. Laying up just short of it will leave you with a mid iron to a very elevated green. Take plenty of club here as the false front must be avoided. Keep your fingers crossed that the right pin placement is not being used.
| Black |
380 |
| Blue |
373 |
| Gold |
363 |
| Silver |
357 |
| Green |
271 |
| |
Men's |
Women's |
| Par |
4 |
4 |
| Handicap |
7 |
5 |

Hole 2
Across the street to the 350 yard Par 4. A little fade on the tee shot, into the saddle, gets you in position for a mid-iron into this inverted green. Play a bump and run just to the right of the green for best results.
| Black |
350 |
Blue
|
345
|
| Gold |
334 |
| Silver |
295 |
| Green |
221 |
| |
Men's |
Women's |
| Par |
4 |
4 |
| Handicap |
9 |
9 |
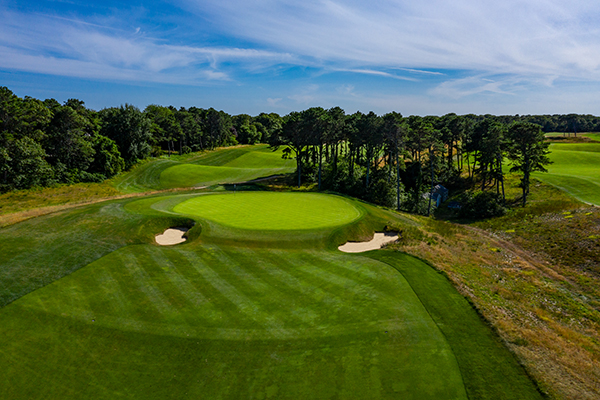
Hole 3
From the back tees, a carry of 185 yards is necessary to carry the ravine, fescue and the three daunting bunkers at the top of the hill. If this is properly done, a short - but exacting, iron will be needed into this rolling, tricky green. A tiny bit long or right on the approach will find you out of bounds.
| Black |
326 |
Blue
|
305
|
| Gold |
289 |
| Silver |
256 |
| Green |
197 |
| |
Men's |
Women's |
| Par |
4 |
4 |
| Handicap |
11 |
13 |
Hole 4
The first of four brilliant par three holes by Fowler. At 182 yards, the prevailing wind is left to right, toward the bay and certain doom. The severely pitched green from back to front will defy all those that go long, left or right. Stay in front and chip or putt up for your best chance at par.
| Black |
182 |
Blue
|
165
|
| Gold |
155 |
| Silver |
149 |
| Green |
91 |
| |
Men's |
Women's |
| Par |
3 |
3 |
| Handicap |
17 |
15 |
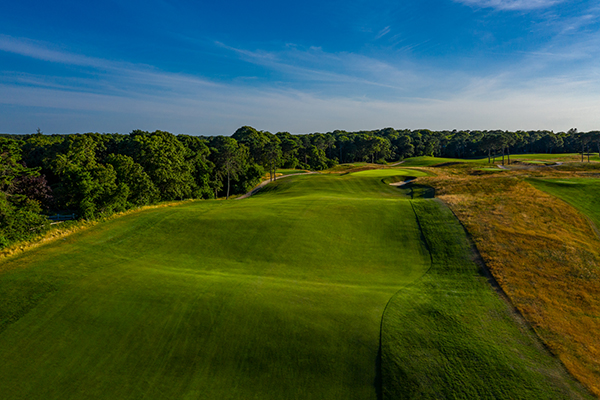
Hole 5
This 525 yard par 5 has a fairway of bumps, moguls, hills and dales. Two well struck shots should get you a relatively level lie for a short iron approach. When the wind is in your face (usually), a blind third shot can be expected. When you finally arrive, you will be greeted by one of the flatter greens on the course.
| Black |
525 |
Blue
|
499
|
| Gold |
475 |
| Silver |
464 |
| Green |
349 |
| |
Men's |
Women's |
| Par |
5 |
5 |
| Handicap |
3 |
1 |
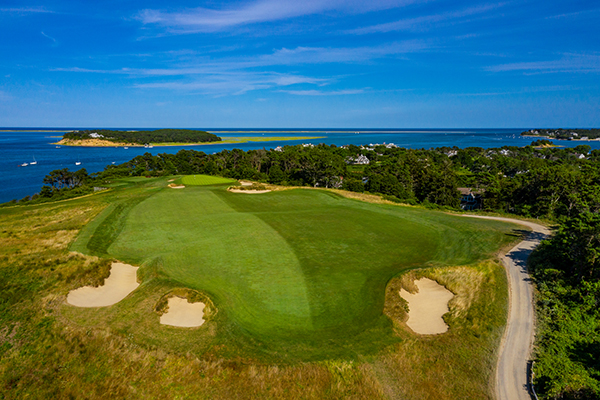
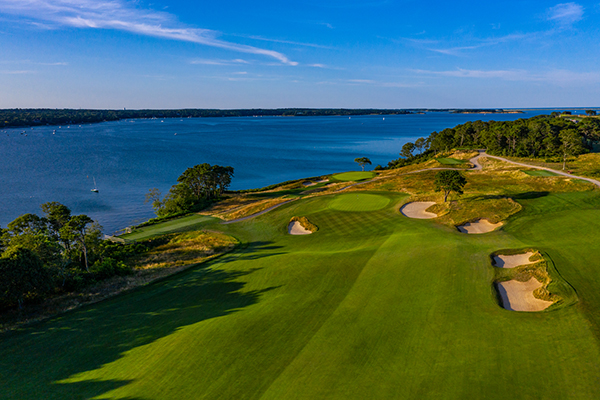
Hole 6
This 455 yard beauty is one of the signature holes of the front side. An elevated tee shot aimed at Strong Island should get you over the hill and down toward the 175 yard range. The second shot will encounter a green protected by one of the steepest banks you'll find at Eastward Ho! Come up just short and watch the ball roll back 30 - 40 yards. With the bay twenty feet left of the green and a two tiered putting surface, par is a rare commodity here.
| Black |
455 |
Blue
|
410
|
| Gold |
399 |
| Silver |
386 |
| Green |
276 |
| |
Men's |
Women's |
| Par |
4 |
4 |
| Handicap |
1 |
3 |
Hole 7
The second of Fowler's devious par 3 holes. At 181 yards, the tee shot is uphill and usually into a stiff breeze. Any sort of side spin off the tee shot can end up over on the 6th fairway or into the brush on the right. A solid long iron or fairway wood will be needed to reach the putting surface and then the adventure continues with a severe back to front sloping green.
| Black |
181 |
| Blue |
168 |
| Gold |
155 |
| Silver |
140 |
| Green |
62 |
| |
Men's |
Women's |
| Par |
3 |
3 |
| Handicap |
15 |
17 |
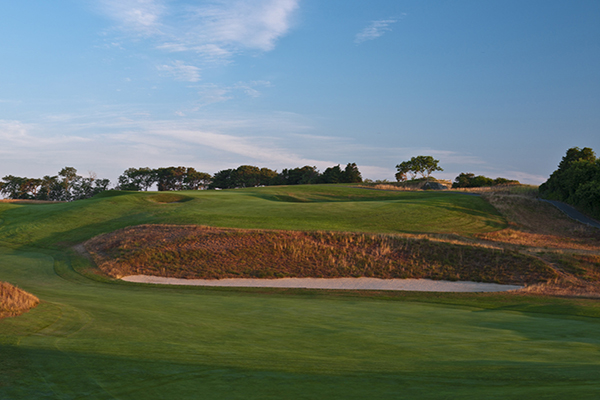
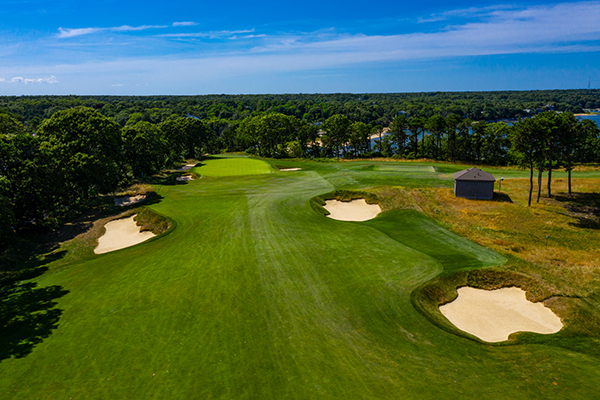
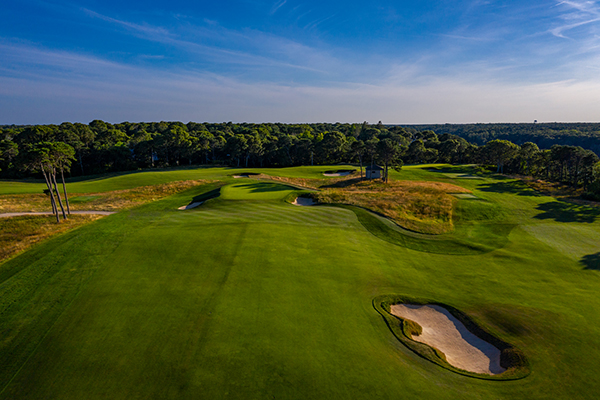
Hole 8
This relatively short par 4 usually plays directly into the southwest wind, making it play much longer. Like many of the holes at Eastward Ho!, the hole goes downward before you then navigate your way back up the hill. The three cross bunkers (which were restored during the Keith Foster restoration) need to be avoided. Laying up short of them will require a 150 yard shot to a blind green with a severe pitch from back to front. Not many birdies are made on this green.
| Black |
348 |
Blue
|
338
|
| Gold |
318 |
| Silver |
305 |
| Green |
303 |
| |
Men's |
Women's |
| Par |
4 |
4 |
| Handicap |
13 |
11 |
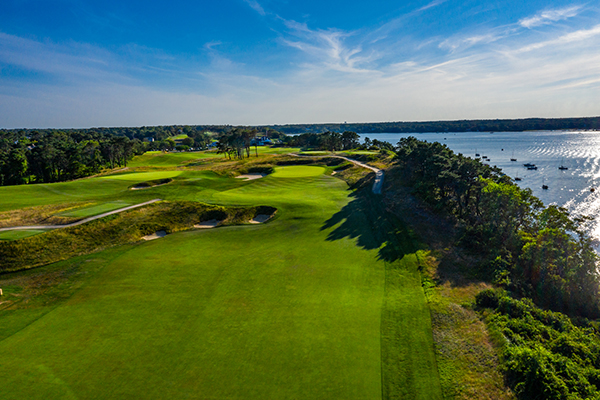
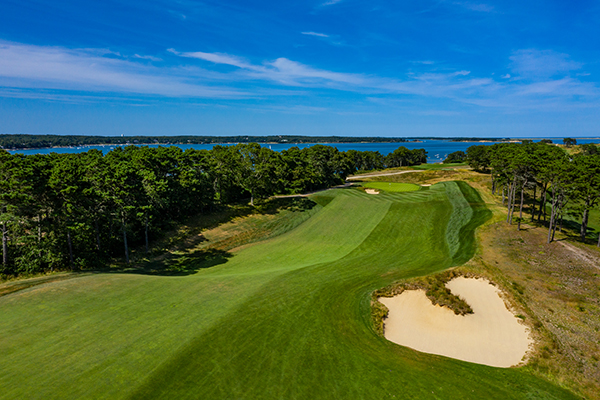
Hole 9
Back to the Clubhouse from one of the great views in all of golf. A well struck drive into the teeth of the wind is required to reach the fairway plateau. Not enough gusto and the second will be played into the wind from a valley- a bad option, at best. The relatively flat green falls off right and left, so the approach must be deadly accurate.
| Black |
396 |
Blue
|
381
|
| Gold |
364 |
| Silver |
355 |
| Green |
300 |
| |
Men's |
Women's |
| Par |
4 |
4 |
| Handicap |
5 |
7 |
Hole 10
Off to start the back nine with another Fowler gem. This 208 yard par three remains today as a fierce and demanding hole. A long iron or fairway wood must be well struck to avoid the road on your left and fescue on the right. A really poor tee shot can land in either of two bunkers well short of the green. Once on the green, the right to left slope provides a challenge all its own. The rugged look from the tee is a Fowler masterpiece.
| Black |
208 |
Blue
|
195
|
| Gold |
184 |
| Silver |
179 |
| Green |
135 |
| |
Men's |
Women's |
| Par |
3 |
3 |
| Handicap |
14 |
16 |
Hole 11
At 485 yards, this might seem a pushover par 5 by today's standards. The blind tee shot must be kept left of center (watch out for the OB, though) to avoid a sharp drop-off on the right side. The second shot is also blind and needs to be played with a draw to reach the flat part of the fairway, some 60 - 100 yards from the green. A solid pitch is required to the center of the green. If not hit with enough authority, the ball will roll all the way off the green, down the fairway, some 20 to 30 yards away. A very unique hole.
| Black |
485 |
| Blue |
485 |
| Gold |
448 |
| Silver |
405 |
| Green |
340 |
| |
Men's |
Women's |
| Par |
5 |
5 |
| Handicap |
2 |
2 |
Hole 12
A short, but difficult hole. At only 333 yards, this tee shot must be hit perfectly down the left side to get a flat lie for the short iron approach. Any tee shot short or right will be left with a blind second shot. The turtlebacked green repels all but the most skillfully executed approach shots. Deep bunkers left and right protect the putting surface.
| Black |
333 |
Blue
|
320
|
| Gold |
317 |
| Silver |
236 |
| Green |
234 |
| |
Men's |
Women's |
| Par |
4 |
4 |
| Handicap |
8 |
14 |
Hole 13
This 336 yard slight dogleg right, is one of the easier holes on the back nine, provided the driver is not wayward. Several new fairway bunkers were added in 2018 which makes club selection and accuracy a premium. Fescue on the right and Route 28 to the left are there to keep the golfer on their toes. The short iron approach must be dead on, as bunkers left and right protect the narrow green. Not a bad place for a bump and run approach, as the fairway in front is firm, fast and wide open.
| Black |
336 |
Blue
|
326
|
| Gold |
318 |
| Silver |
264 |
| Green |
262 |
| |
Men's |
Women's |
| Par |
4 |
4 |
| Handicap |
12 |
12 |
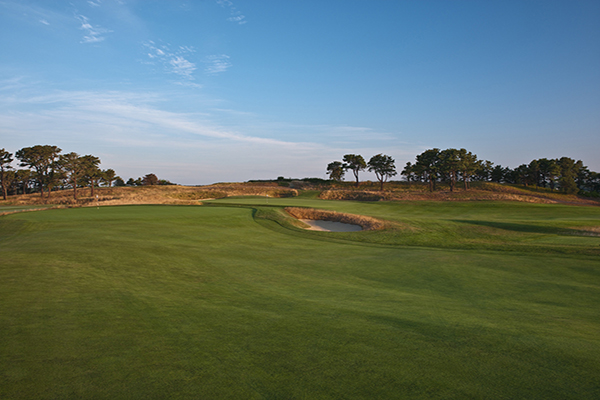
Hole 14
The famous "elephant hole," a deep gash that runs along the left side of the fairway, some 200 yards from the tee. Extending some 15 feet down, a player is doomed if their ball does not carry it, wishing that they had taken a more conservative route to the right. The approach shot from the top of the hill provides a dramatic and stunning view of Pleasant Bay and its surroundings. The approach must carry the false front part of the green, but stop before the green begins to run away.
| Black |
371 |
Blue
|
365
|
| Gold |
316 |
| Silver |
308 |
| Green |
258
|
| |
Men's |
Women's |
| Par |
4 |
4 |
| Handicap |
16 |
8 |

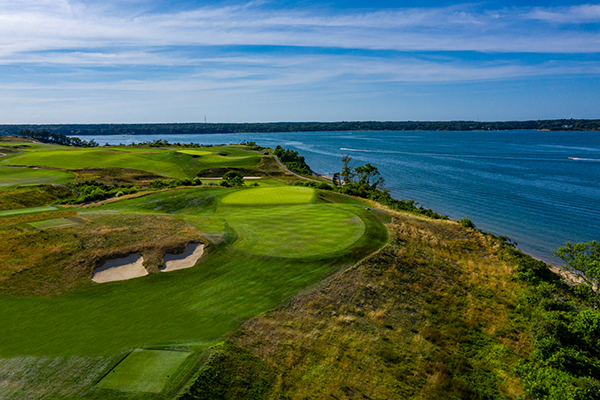
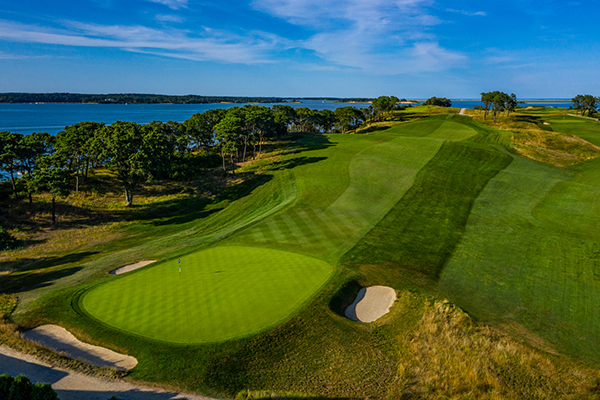
Hole 15
Eastward Ho!'s signature hole, the famous 15th. One of the most scenic par three holes in America, the 15th measures 153 yards. The three tiered green can have the most diabolical pin placements and wind shifts and gusts make club selection a challenge. The bay is only six feet left of the green and a deep bunker protects the green from those who respect the bay too much. A real gem!
| Black |
153 |
Blue
|
145 |
| Gold |
137 |
| Silver |
128 |
| Green |
78 |
| |
Men's |
Women's |
| Par |
3 |
3 |
| Handicap |
18 |
18 |
Hole 16
Usually played back into the wind, this 411 yard hole plays much longer. A good solid drive is needed in order to reach this green with a mid-iron. The second shot requires precision as it is bunkered deeply on both sides. Being short is not a bad play here, leaving the player with an uphill chip. Green slopes fairly steeply from back to front, so going long is not an option.
| Black |
411 |
Blue
|
380
|
| Gold |
362 |
| Silver |
304 |
| Green |
281
|
| |
Men's |
Women's |
| Par |
4 |
4 |
| Handicap |
4
|
6 |
Hole 17
The final par 5 is a real beauty. Usually played downwind, the longer driver can have a go at this one in two, however, the drive must be perfect. Too much to the left is in the trees and too much to the right and down it goes into a deep gully. The shorter hitter will play up the middle and play a fairway club up to the left side of the fairway, leaving a 150 yard third shot. The up and down, side to side, undulating fairway is a constant battle here, not to mention the cavernous Fowler Bunker which gobbles up all second shots that stray too far to the right. A great drive here can yield an eagle attempt and a poor one has you fighting for bogey. Play it safe and plod along down the left side for your best chance at par.
| Black |
537 |
Blue
|
520
|
| Gold |
505 |
| Silver |
451 |
| Green |
391 |
| |
Men's |
Women's |
| Par |
5 |
5 |
| Handicap |
10 |
4 |
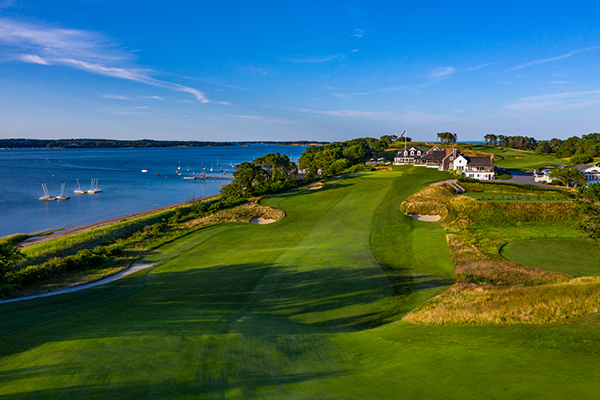
Hole 18
One of the greatest finishing holes in all of golf. 460 yards of beauty and fury! Your best drive of the day is required here. Hit it strongly and with a draw and you can catch the downslope and sling the ball down the fairway with less than 200 yards to go. Hang it out to the right and you have over 250 yards. It's no wonder, with this much pressure on the golfer, that we see some of the worst drives on this hole. The final 125 yards go uphill to yet another false front green that slopes front to back and right to left. This magnificent hole has been the ruin of many, many good rounds.
| Black |
460 |
Blue
|
448
|
| Gold |
404 |
| Silver |
396 |
| Green |
303 |
| |
Men's |
Women's |
| Par |
4 |
5 |
| Handicap |
6 |
10 |
|
|